Using RecyclerView With Multiple Items
A simple pain point I always seemed to encounter when developing for Android is dealing with multiple items types in a ListView or a GridView. Luckily, RecyclerView has some pretty neat built in support for this feature, and I’ve used it successfully with collections containing >10 item types. Adding that kind of complexity can lead to lots of ugly code in your adapter, and trying to keep that clean will help in maintainability and reduce possible bugs. Let’s build a quick app that shows various fruits and veggies with specific styling for their type.
First off, lets start with the crux of the implementation: the Adapter’s item model.
public class FruitVegItem<T> {
    @Retention(RetentionPolicy.SOURCE)
    @IntDef({FRUIT, VEGETABLE})
    public @interface ViewType {
    }
    public static final int FRUIT = 0;
    public static final int VEGETABLE = 1;

    T object;
    @ViewType int viewType;

    public FruitVegItem(T object, int viewType) {
        this.object = object;
        this.viewType = viewType;
    }
}
Using this object, we can wrap the item’s model and have it specify it’s item type for the adapter.
Next, let’s use it in the adapter:
private final List<FruitVegItem> list;

...

    public void addFruit(String fruitName){
        list.add(new FruitVegItem<>(fruitName, FruitVegItem.FRUIT));
        notifyItemInserted(list.size());
    }

...
By exposing a simple API for each item type, the adapter can control how and where each item is added into it’s backing collection.
ViewHolders
Since we have different items, it makes sense to have different item ViewHolder objects and layouts.
public class FruitViewHolder extends RecyclerView.ViewHolder{

    public TextView name;

    public FruitViewHolder(View itemView) {
        super(itemView);
        name = (TextView) itemView.findViewById(R.id.name);
    }

    public static FruitViewHolder create(Context context, ViewGroup parent){
        return new FruitViewHolder(LayoutInflater.from(context).inflate(R.layout.item_fruit_veg, parent, false));
    }

    public static void bind(FruitViewHolder holder, final String name){
        holder.itemView.setBackgroundResource(R.color.fruit_bg);
        holder.name.setText(name);
    }

}
<?xml version="1.0" encoding="utf-8"?>
<LinearLayout xmlns:android="http://schemas.android.com/apk/res/android"
              android:orientation="vertical"
              android:layout_width="match_parent"
              android:layout_height="match_parent">

    <TextView
        android:id="@+id/name"
        android:gravity="center"
        android:padding="8dp"
        android:layout_width="match_parent"
        android:layout_height="match_parent"/>

</LinearLayout>
The key in the ViewHolder object is that it exposes static create and bind method calls. The create method is just a static factory method, a common practice in Java. The bind method, however, allows use to abstract all ViewHolder binding logic into the object itself, rather than polluting the adapter’s #onBindViewHolder method.
Adapter
Now that we’ve setup the wrapper object and the viewholder logic, lets take a look at what the adapter has to do to button all this up.
First off, make sure you override the RecyclerView.Adapter#getItemViewType method. This method lets the adapter know to expect multiple view types and not attempt to use a recycled ViewHolder of the wrong type.
...
@Override
public int getItemViewType(int position) {
    return list.get(position).viewType;
}
...
Finally, the adapter needs to actually create and bind the view holders:
@Override
public RecyclerView.ViewHolder onCreateViewHolder(ViewGroup viewGroup, int viewType) {
    switch (viewType){
        case FruitVegItem.FRUIT:
            return FruitViewHolder.create(context, viewGroup);
        case FruitVegItem.VEGETABLE:
            return VegViewHolder.create(context, viewGroup);
    }
    return null;
}

@Override
public void onBindViewHolder(RecyclerView.ViewHolder viewHolder, int position) {
    switch (getItemViewType(position)){
        case FruitVegItem.FRUIT:
            FruitViewHolder.bind((FruitViewHolder) viewHolder,
                                 (String) list.get(position).object,
                                 listener);
            break;
        case FruitVegItem.VEGETABLE:
            VegViewHolder.bind((VegViewHolder) viewHolder,
                               (String) list.get(position).object,
                               listener);
            break;

    }
}
Finale
Now you get to use it:
String[] fruits = getResources().getStringArray(R.array.fruits);
String[] veggies = getResources().getStringArray(R.array.vegetables);

for (String veg : veggies) {
    adapter.addVeg(veg);
}

for (String fruit : fruits) {
    adapter.addFruit(fruit);
}

recyclerView.setAdapter(adapter);
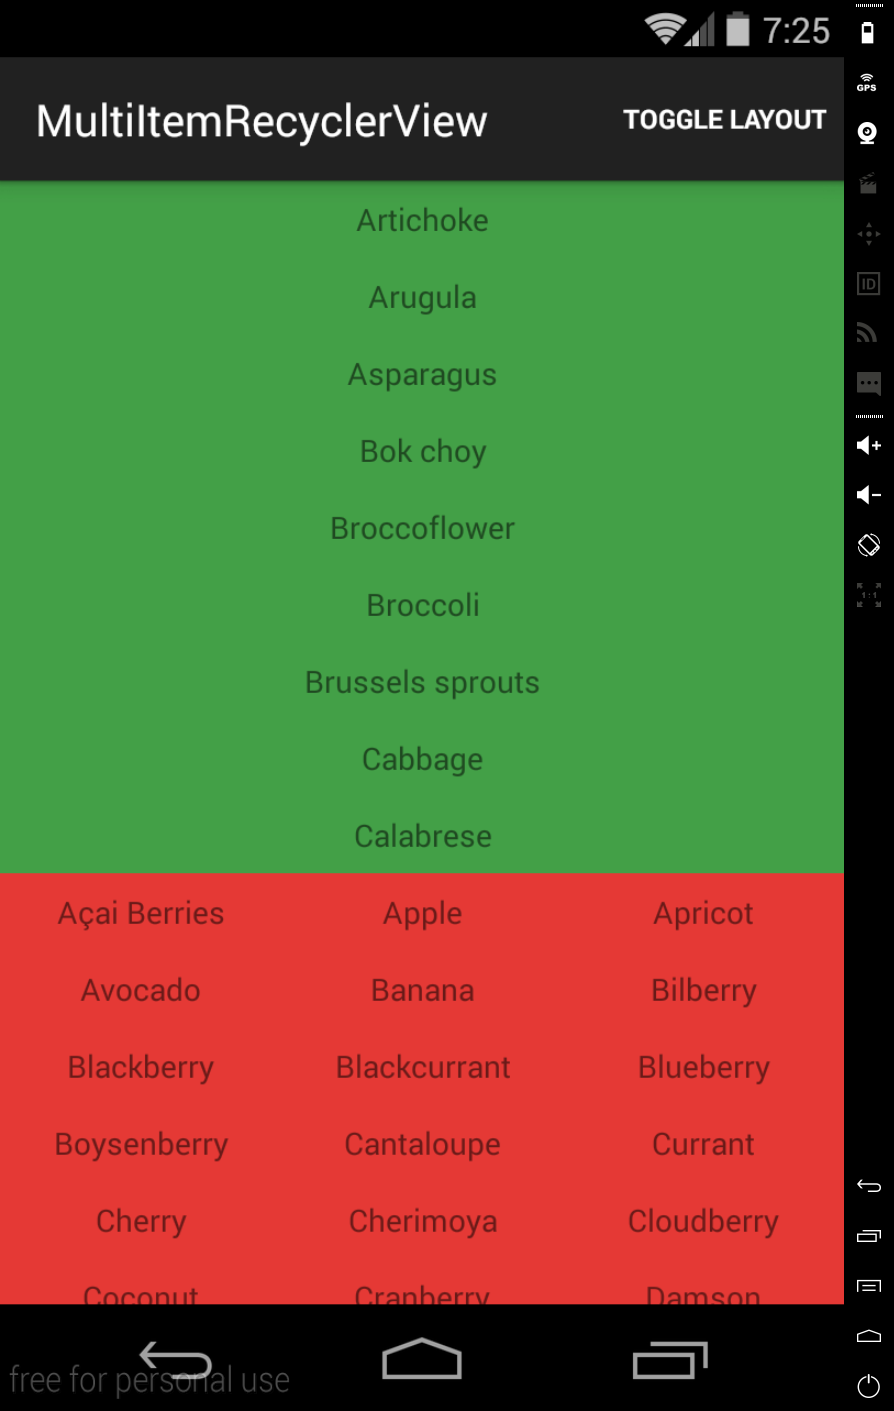
What it ends up looking like:
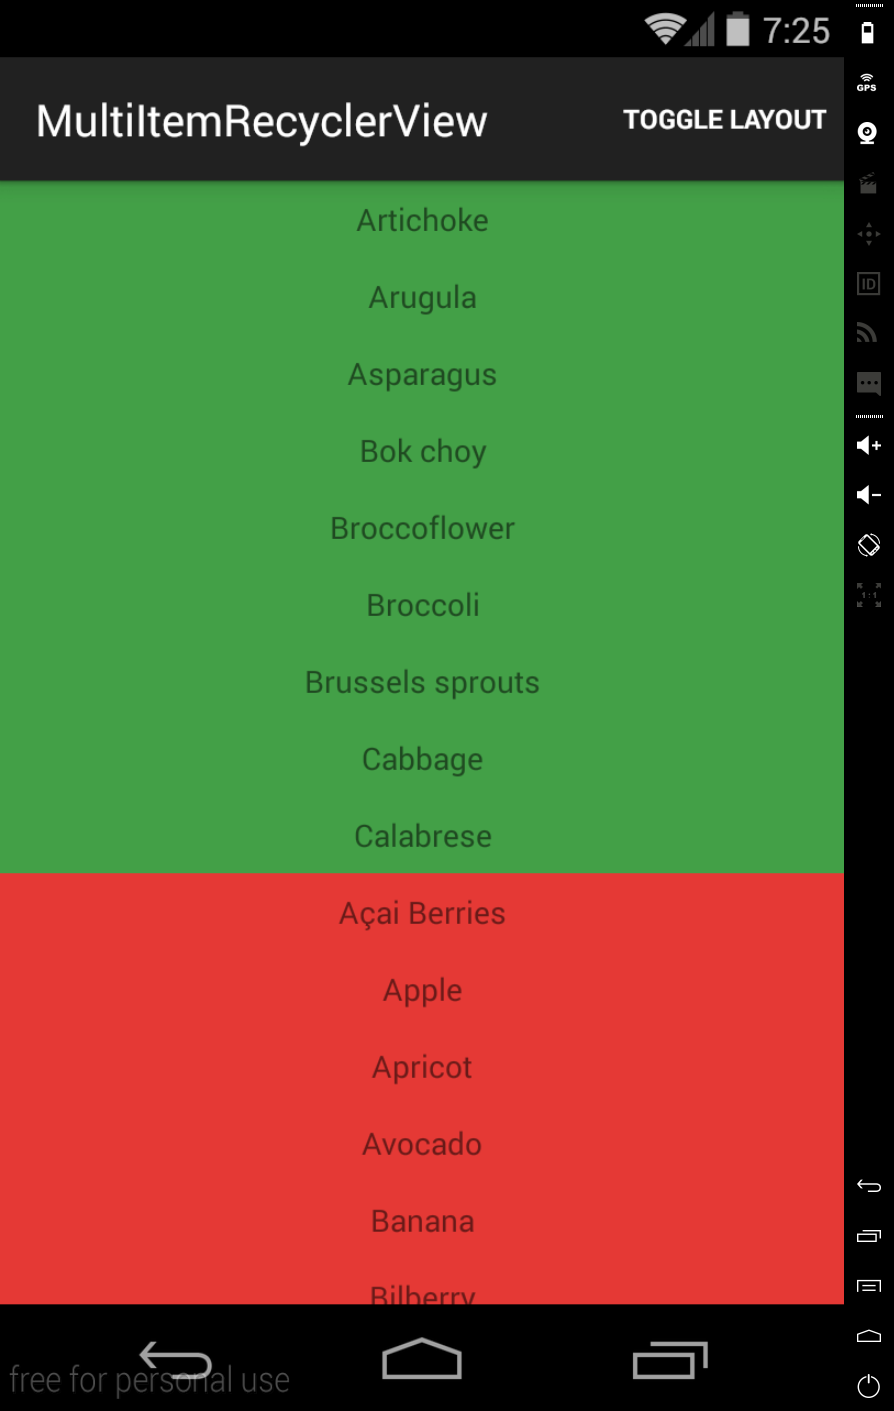
From here, adding new item types is quite simple:
Add a ViewType to the FruitVegItem
Create your ViewHolder and layout
Hook it all up in the adapter
Encore
When you start using viewtypes like this, you can create some pretty fun, complicated layouts easily via the GridLayoutManager
For example:
gridLayoutManager.setSpanSizeLookup(new GridLayoutManager.SpanSizeLookup() {
          @Override
          public int getSpanSize(int position) {
              switch(adapter.getItemViewType(position)){
                  case FruitVegItem.FRUIT:
                      return 1;
                  case FruitVegItem.VEGETABLE:
                      return 3;
              }
              return 0;
          }
      });
You can view the full code (plus click listener implementations) on github